
Yay! So cute, right? And it’s so, so simple. It’s just a big rectangle with ribbons that tie on the sides.
Here’s how you can make your very own.
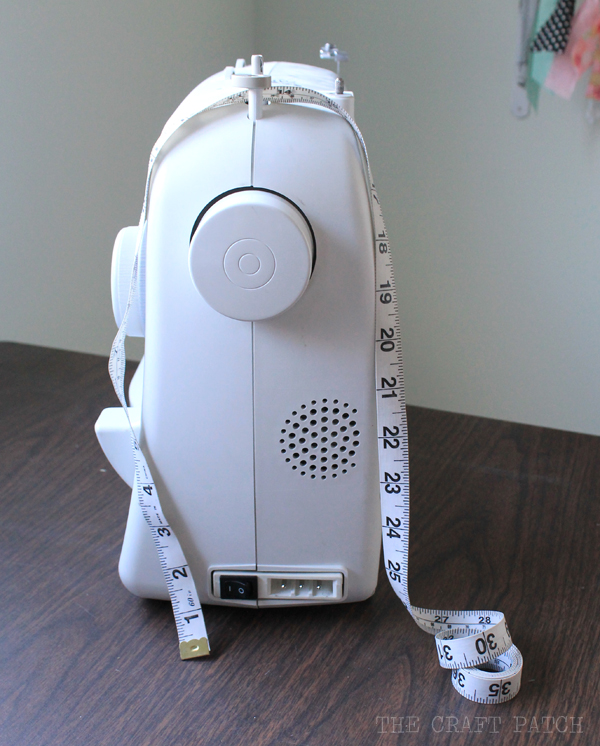
Step 1. Measure your sewing machine from side to side (width). Then measure from the bottom front edge, over the top and down to the bottom back edge (length).
Add 1/2 inch for seam allowances, then cut out two rectangles, one of the main fabric and one of the liner. My rectangles turned out to be 16 inches x 28 inches. The fabulous feather fabric (say that ten times fast) is from Hobby Lobby.
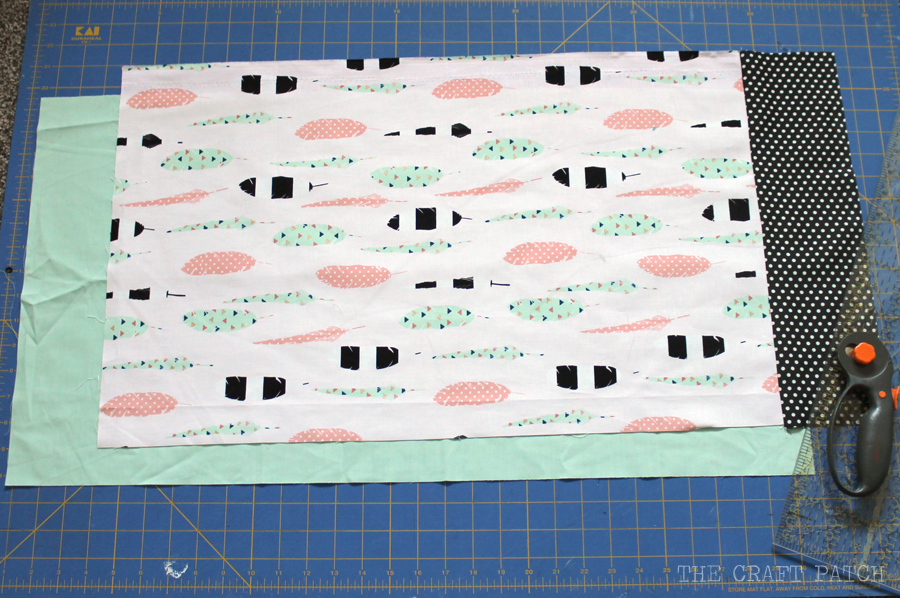
If you want, you can add a contrasting band to one end like I did with the black and white polka dot. It is 4″ tall. I also added pom poms because pom poms make everything better. You’ll want to add any trim or cutesy stuff now, before moving on to the next step.
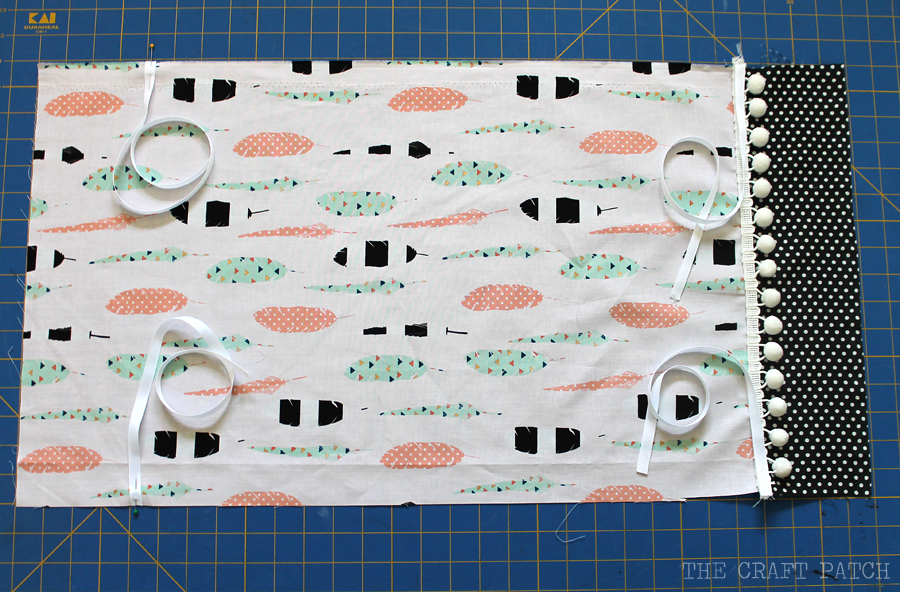
Step 2. Pin the ribbons in place. I cut four 12″ pieces of ribbon and pinned them 4″ from either end, like this:
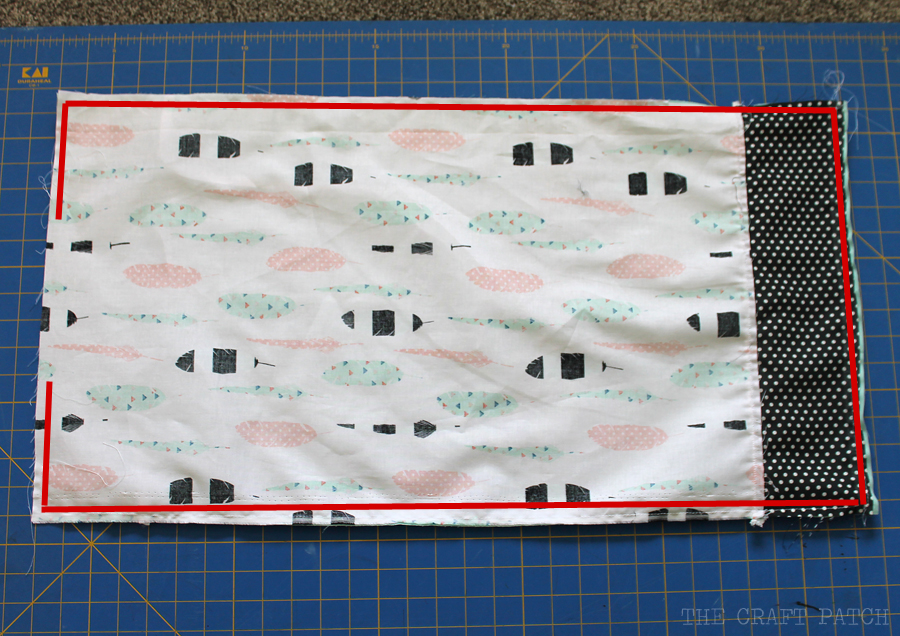
Step 3. Place the liner fabric on top of the main fabric with right sides together, like this:

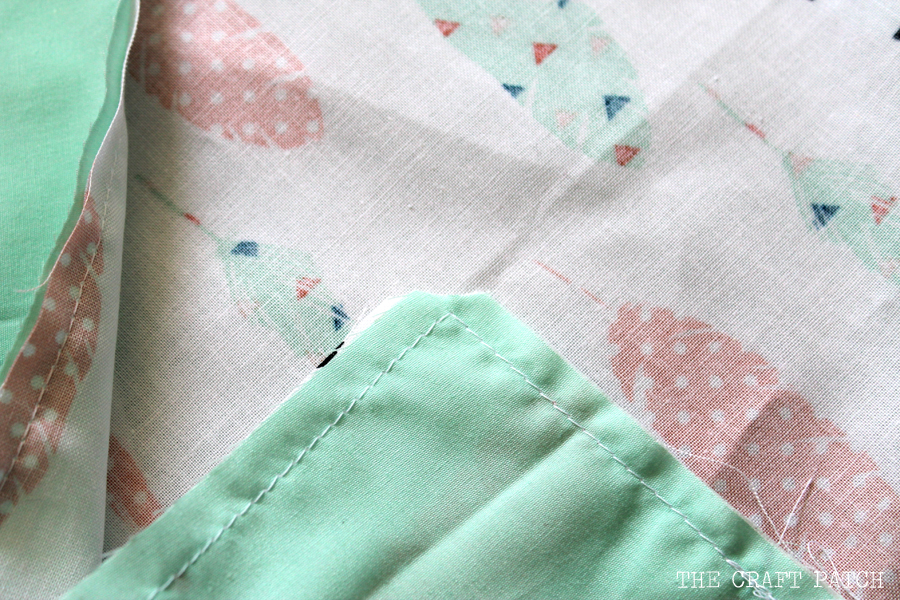
Step 4. Sew around the outer edges, leaving a hole for turning. I drew red lines on this photo to show you how I did this step:
Step 5. Clip your corners like so:
This helps you get clean, crisp corners when you flip it right side out. Just make sure you don’t go past your stitch line or you’ll end up with holes.
Step 6. Turn right side out and press. Get all those edges nice and crisp!

Step 7. You can choose to topstich around the edges of the whole project if you want to. I didn’t. I only sewed along the back edge so I could close up the hole I used for turning.


Comments & Reviews
I saw your project on pinterest and loved it. I made one right away for my sewing machine. It surely beats the ugly case my machine came with!!! Thanks for posting such an easy to follow tutorial.