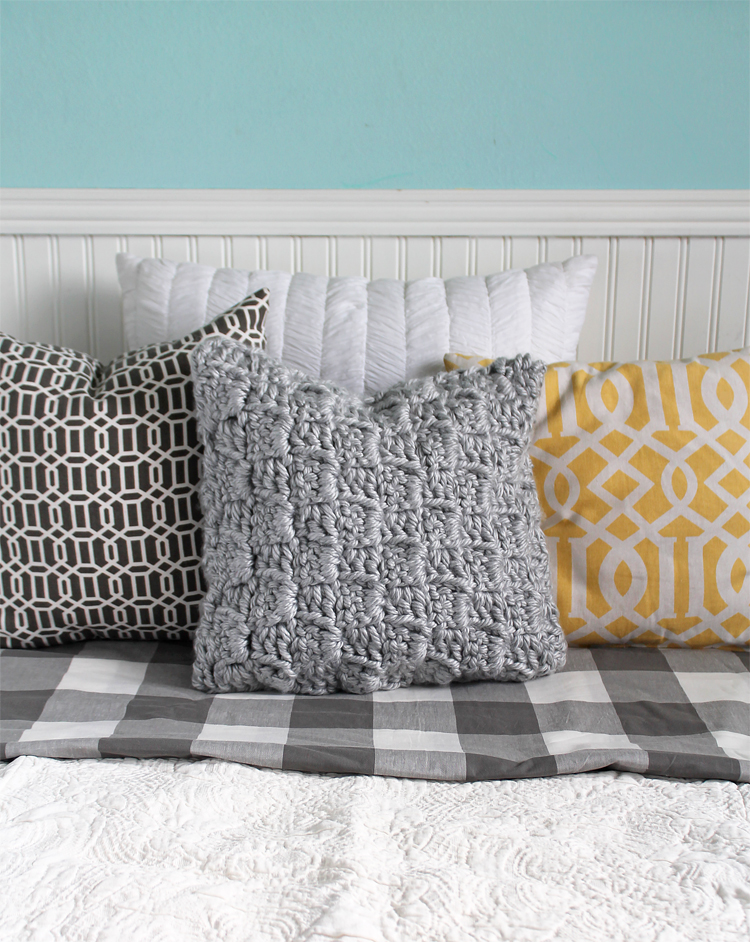
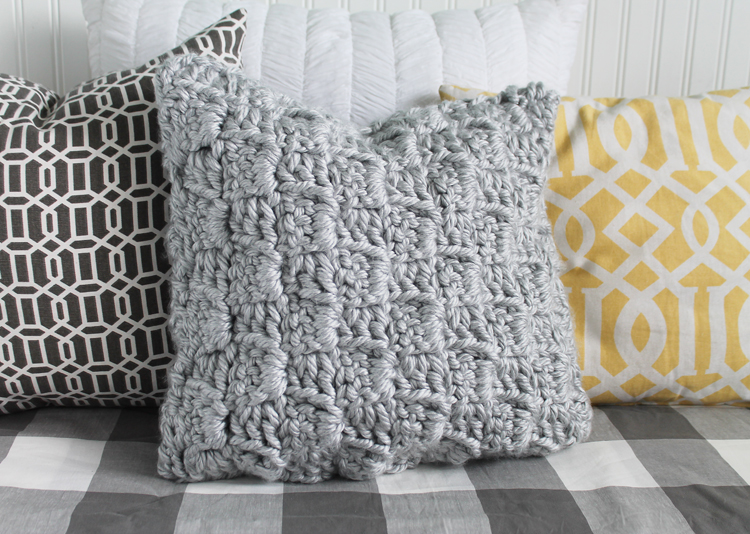
Make this easy crochet pillow cover in no time using super bulky yarn and a fun, textured stairstep crochet stitch.
I have fallen head over heals for crochet. It’s so relaxing to sit and work on a project and it’s portable so I can take it with me in the car or at the park with my kids or to a friend’s house.
I loved the first crocheted pillow I made so much that I decided to try another variation. This time I used a fun crochet stitch that is full of texture and has a stairstep pattern. I LOVE how it turned out and because I used extra bulky yarn, the project came together really quickly. My new crochet pillow is so soft and full of texture. I just love how it turned out so I’m sharing the free pattern and tutorial with you!
Want to make one too? I’ll start with the full written pattern, then I’ll walk you through the pattern step-by-step with pictures!
Chunky Crochet Pillow Pattern
Sign up for our newsletter at the bottom of this post and we’ll send you a free printable PDF version of the pattern.
Materials Needed: (affiliate links included for your conveniece)
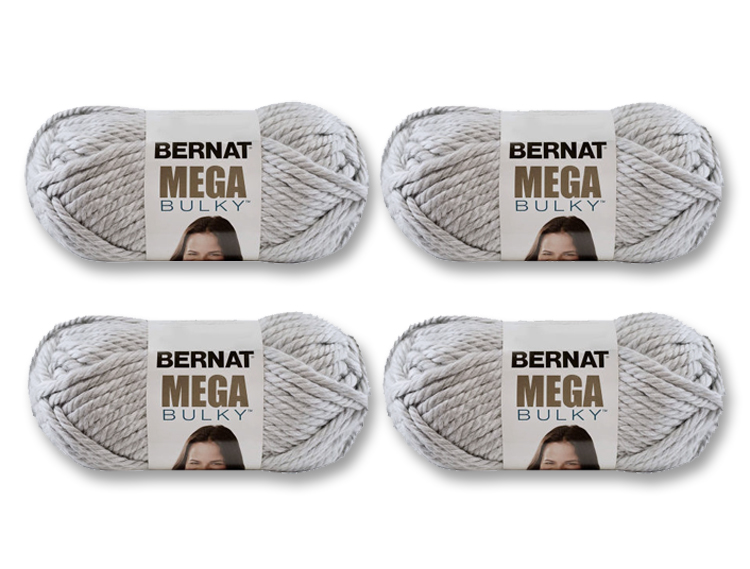
- 4 skeins Bernat Mega Bulky yarn in Light Heather
- Size N crochet hook
- Large Eye Blunt Tip Embroidery Needle
This pattern fits an 18 inch pillow form.
Increase:
Row 1: ch 6, DC in 4th ch from hook, DC in next 2 spaces
Row 2: ch 6, DC in 4th ch from hook, DC in next 2 spaces, flip (see video below), (sl st, ch 3, 3 dc) in ch-3 sp of previous row
Row 3: ch 6, DC in 4th ch from hook, DC in next 2 ch spaces, *(sl st, ch 3, 3 DC) in next ch-3 sp of previous row; rep from * twice; turn
Row 4: ch 6, DC in 4th ch from hook, DC in next 2 ch spaces, *(sl st, ch 3, 3 DC) in next ch-3 sp of previous row; rep from * three times; turn
Rows 5-9: Continue the pattern of increasing 1 block on each row until there are 9 blocks across, or enough squares to fit the size of your pillow form.
Decrease:
Rows 10-18: slip st across first 3 DC, * (slip st, ch 3, 3 DC) in next ch-3 space of previous row; repeat from * to last ch-3 space; slip st in last ch-3 space; turn. Repeat until you’ve completed the square.
Fasten off.
Repeat pattern to make a second square for the back of the pillow.
The last step is to sew the front and back squares together. Using yarn threaded through the blunt tip needle, whip stitch around three sides of the squares. Insert pillow form. Finish stitching across the fourth side. Tie off and tuck in ends.
Crochet Pillow Photo Tutorial:
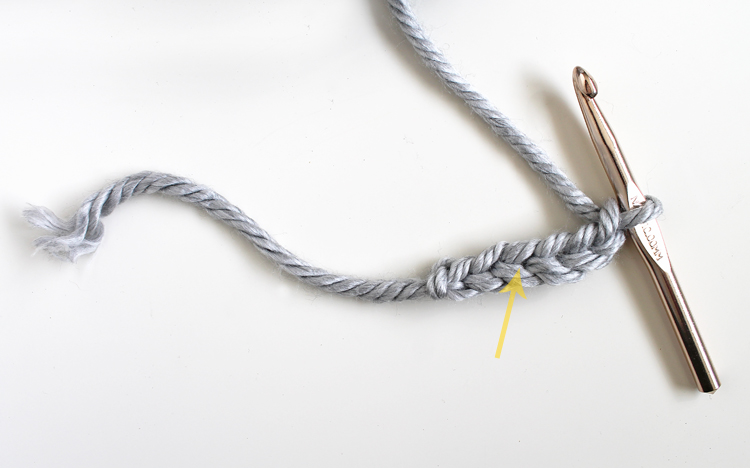
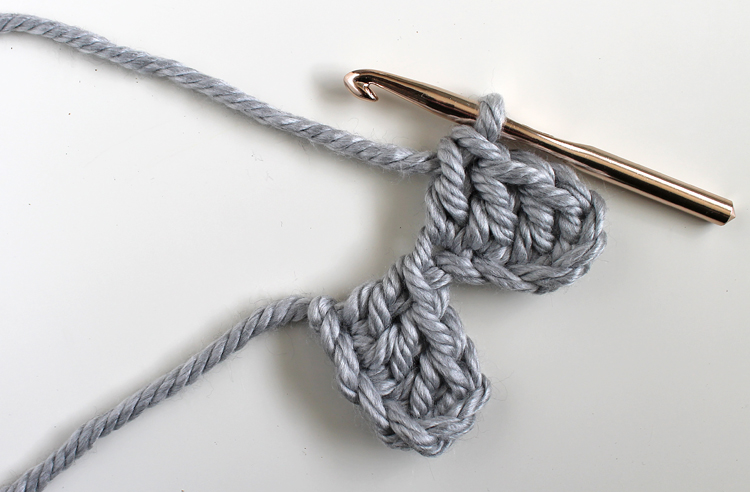
Ch 6. DC into 4th ch from hook.
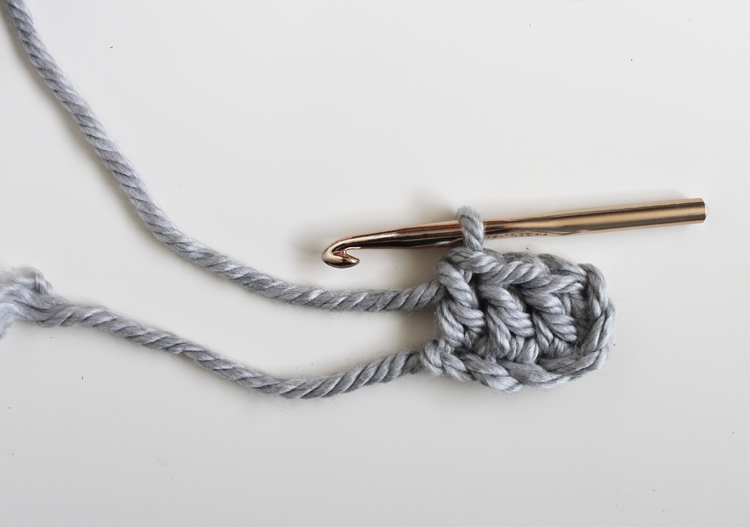
DC into next 2 spaces
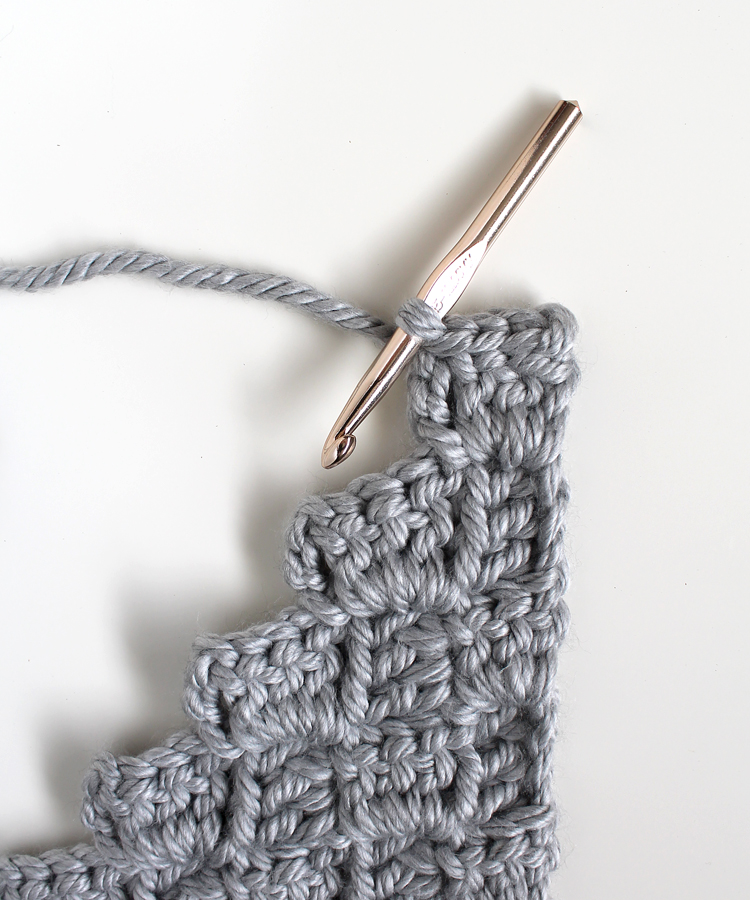
Ch 6. DC into 4th ch from hook.

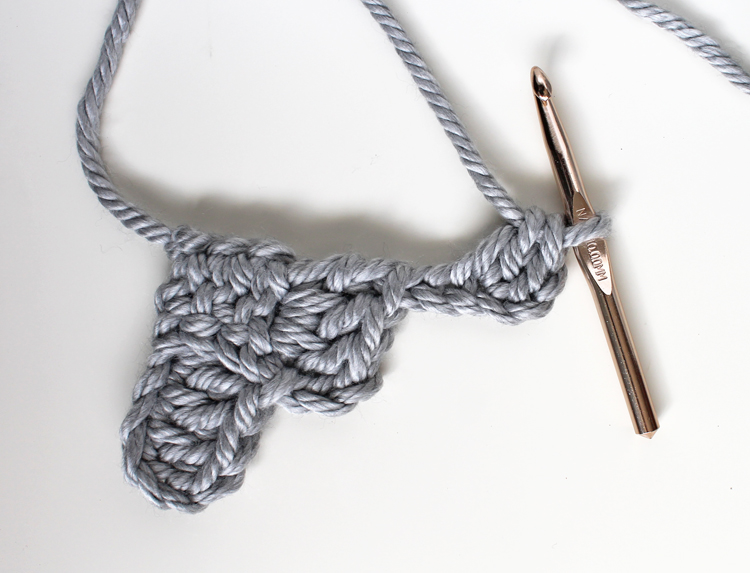
DC in next 2 stitches. FLIP (see video at the end of post).
Sl st in corner of first square. Ch 3.
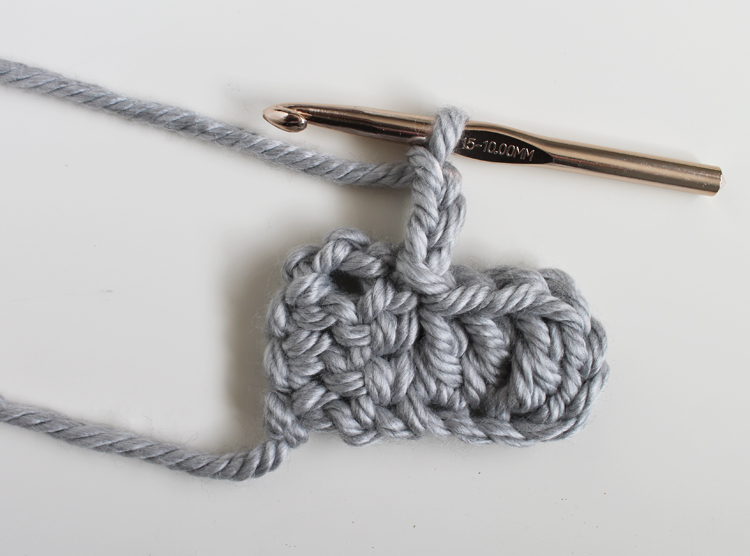
3 DC.
Ch 6.
DC into 4th ch from hook.
DC in next 2 stitches. FLIP.
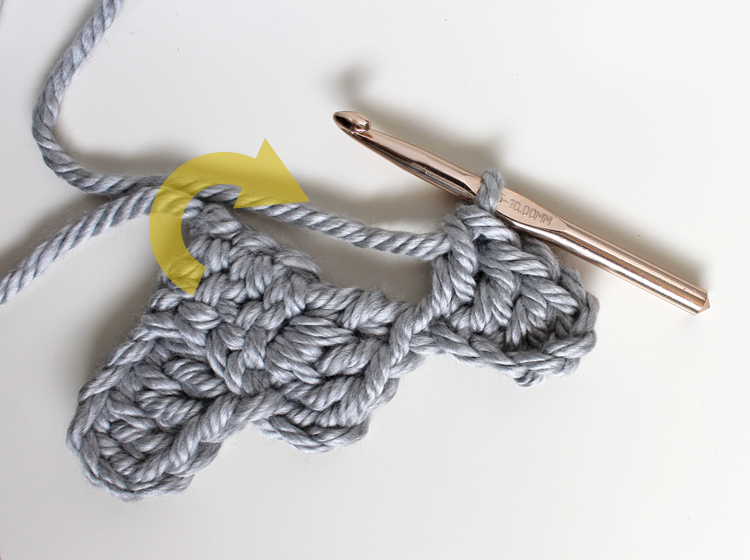
Sl st into corner of round 2 square.
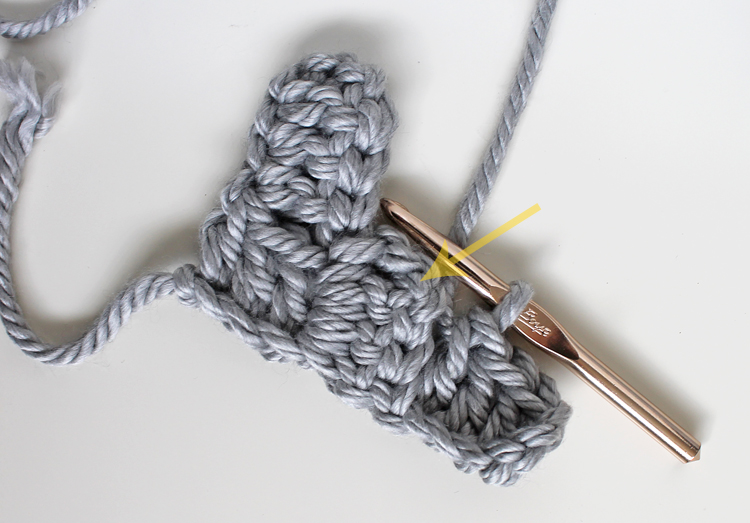
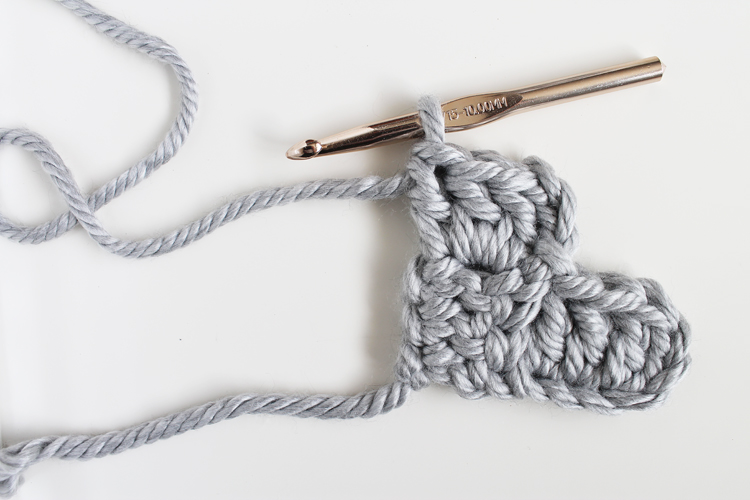
Continue increasing pattern until you have nine rows.
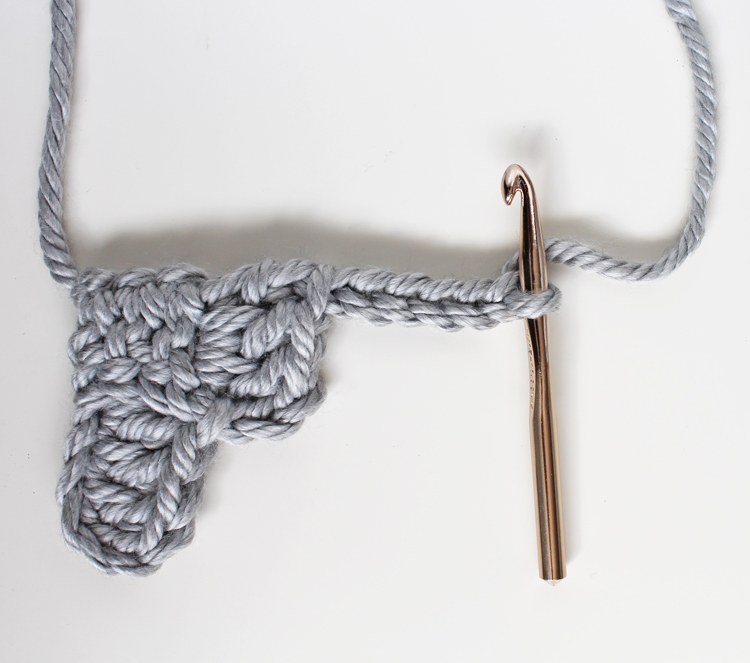
To decrease, sl st across top three stitches.
ch 3, 3 DC, sl st
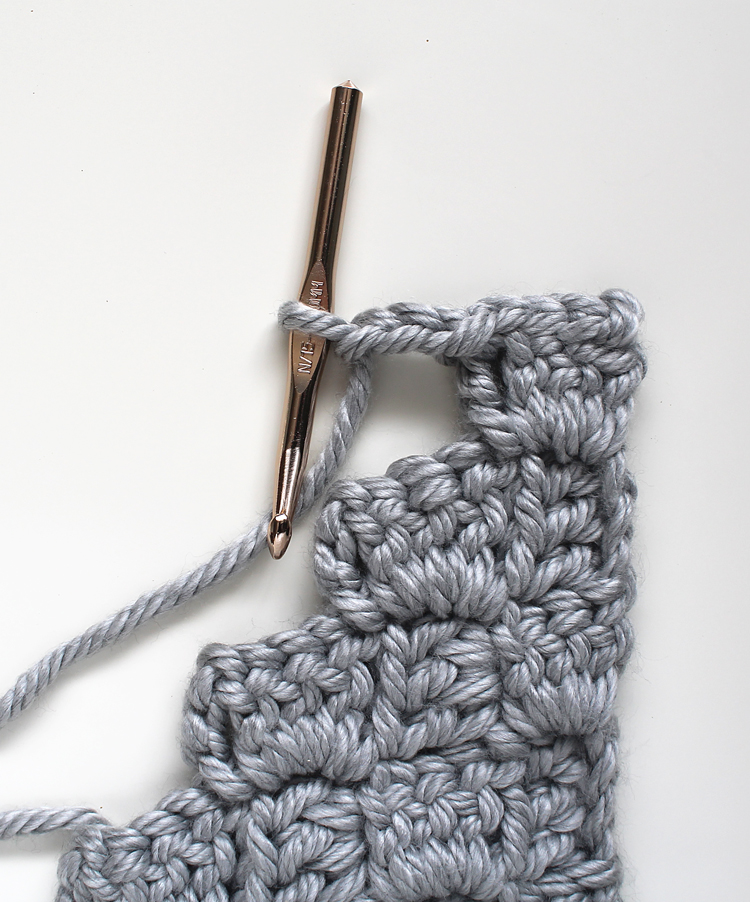
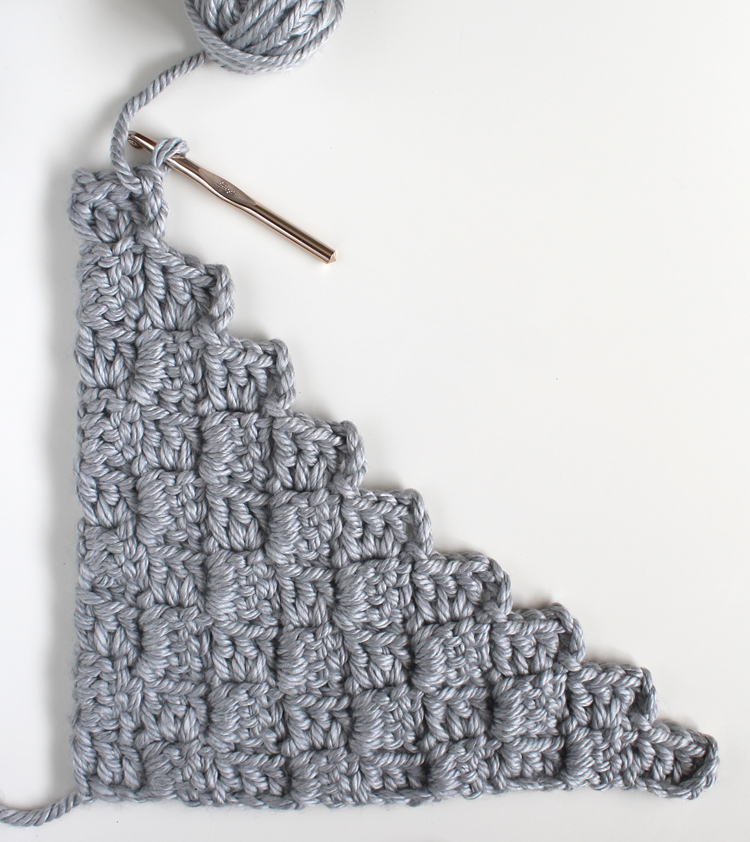
Continue decreasing pattern…
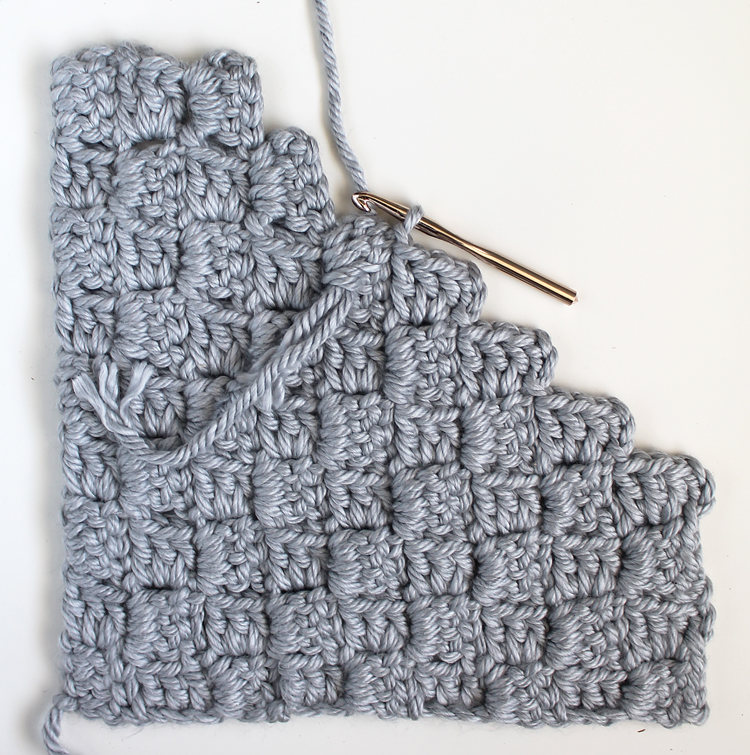
… until you have a completed square.
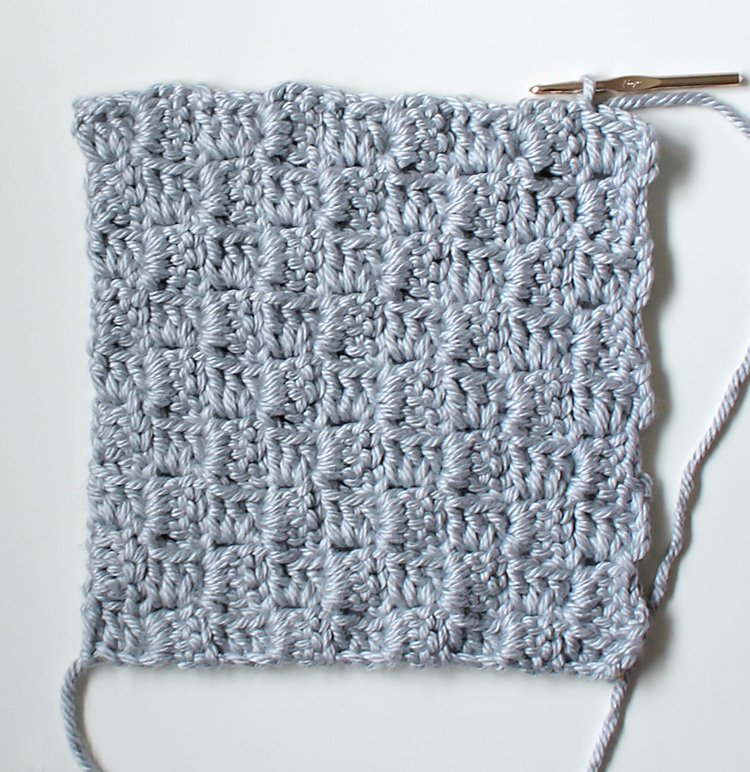
Create a second square in the same manner as the first.
Sandwich the two squares together and whip stitch three sides together.
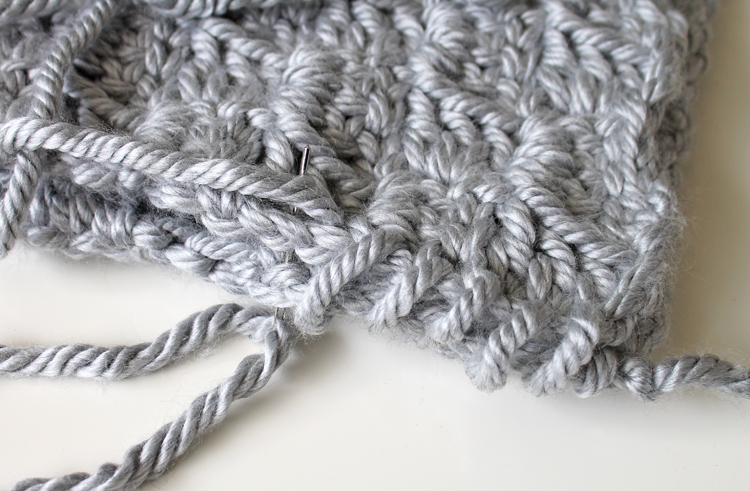
Insert pillow form, then whip stitch fourth side closed.
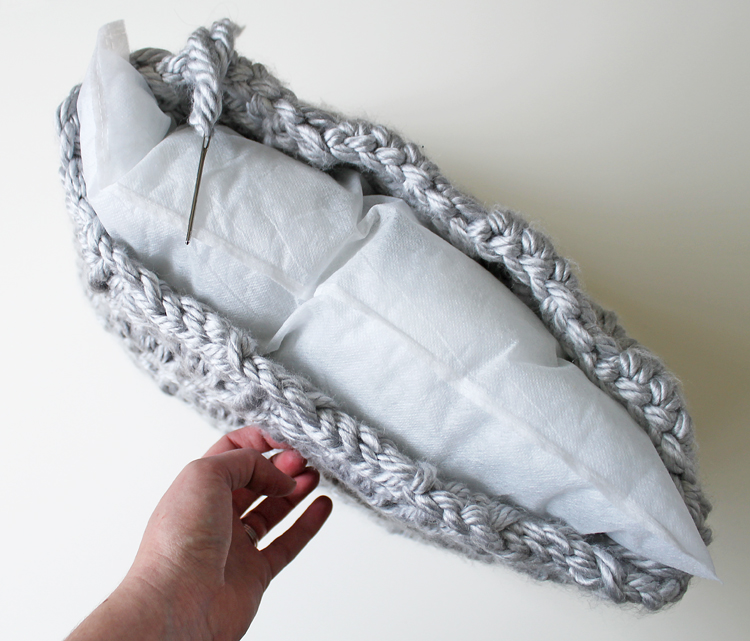
Tie off ends and weave in.
There’s really only one tricky instruction in this crochet pillow pattern, so I’ve included a short video to show you how to do the FLIP required at the beginning of each new row.
I hope you enjoy your new crochet pillow! Happy Crafting!
Sign up for our newsletter and we’ll send you a free printable PDF version of this crochet pattern!
Comments & Reviews
That is a very cute pillow. Love it.
This looks great and I'm going to give it a try. Wondered what weight of balls of wool needed for the pattern. Thanks
I'm not sure about weight, but I used about 250 yards of extra bulky yarn. Hope that helps!
Thanks
hi I love this stitch yet I am struggling with decrease. the video will not play for me. I count 9*9 on the pictured project. Perhaps why my decrease is looking quite different? any help is greatly appreciated! thanks so much, angie
Angie, maybe you could send me a picture of your project so I have more of an idea of what's happening. Find my Facebook page (www.facebook.com/thecraftpatch) and post a picture there and I'll see if I can help you.
I have the same problem as Angie. If I sl st across the top 3 (when finished with the increases) I end up at the straight edge and not the top of the "stepped" edge. Then the instructions just fall apart & don't jive with what's ahead of the hook.
Hi I love the look of this. Are the instructions UK or american?
American
could you use 2 strands of yarn together to make a bulky yarn? Super cute and easy, what could you use in place of the pillow form? where i live, not much here. and on a tight budget…Happy to hear your answer! Thank you for sharing the pattern.:)
Annette, YES! You can definitely use two strands of yarn together. If you don't have a pillow form, you could sew two squares together, leaving a hole for stuffing, then fill it with batting… or old fabric scraps or grocery bags or anything else you think might work.
I was eyeing this pattern for quite a long time, I really liked how it looked. But was a bit afraid it would be too complicated for me, since the result looks so advanced and I'm quite a beginner at crocheting. But, two days ago I decided to give it a try, and today I am super happy with my brand new, amazing pillow cover! Very easy pattern (the pictures and video were great help!), worked up very quickly and looks soooo nice! Thank you so much for it!!! x
Congratulations, Marubi! I'm so glad you gave it a try. It feels great to create, don't you think?
Thanks^^ It sure does, I love watching how something neat is taking shape right under my hands 😀 Is it OK to make more pillows with your pattern and give them away as gifts? With credit, of course 🙂 x
Yes, of course!
Awesome, thanks again! 🙂 x
I can’t seem to find the video at the end of the post?
Hey Alexis, I did some backend maintenance recently on my blog and it messed up a lot of my videos. I’ll get it uploaded and put back at the bottom of the post soon!
Love this pattern and it works up so fast!! Thanks!!
Thank you for the pattern,I love it. The only issue I have is that when it’s stretched over the pillow I can really see the pillow underneath, I prefer the look in your picture. I used a wine color so the white underneath is very noticeable.
Hi Cara! If you can see through the design, try using a smaller hook or thicker yarn OR a slightly smaller pillow so it doesn’t stretch out as much. Or maybe you can find a piece of fabric in a similar color and wrap it around the pillow insert before adding the crochet cover on top? Hope that helps!