Today is a momentous day. After months of remodeling, headache and mess, my craft room is completely built, organized, and decorated! Want to come take the tour? I can’t wait to show you! This is your chance to look in all my drawers and see every nook and cranny of this new, gorgeous space.
Warning: mega long post ahead.
We did some major construction in this room. Read all about that hot mess HERE, HERE and HERE. Or here’s the ten second version:

And now, without further adieu, here is my happy place!


I’m so excited, and I just can’t hide it. I’m about to lose control and I think I like it.
Shall we take a closer look around? Come on, you know you want to snoop in every last corner!
Let’s start at the doorway and work our way around the room. Sound good?
The first thing you see is this little decorative shelf:

The apron hanging from the hooks is a hair cutting cape that my grandma made for my grandpa. It’s so special to me and I wanted to have it in a place where I could see it every day.
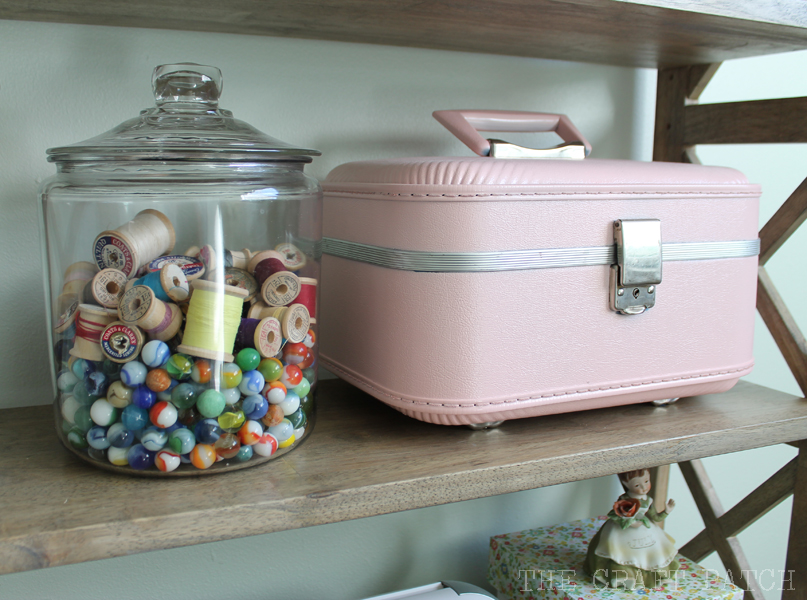
Next up is the bookcase. I stained it myself.

I found the thread racks at a thrift store. The button jars are from my husband’s grandma. She kept her buttons in old hot fudge jars and I thought it was so cute that when I inherited her sewing stuff, I kept the jars and just spray painted the lids. The ribbon is strung onto a dowel that rests in the X of the bookcase.

The vintage marbles and wooden spools are also from my husband’s grandma. I spray painted the suitcase (found it at a yard sale).
These photo storage boxes hold a variety of items.
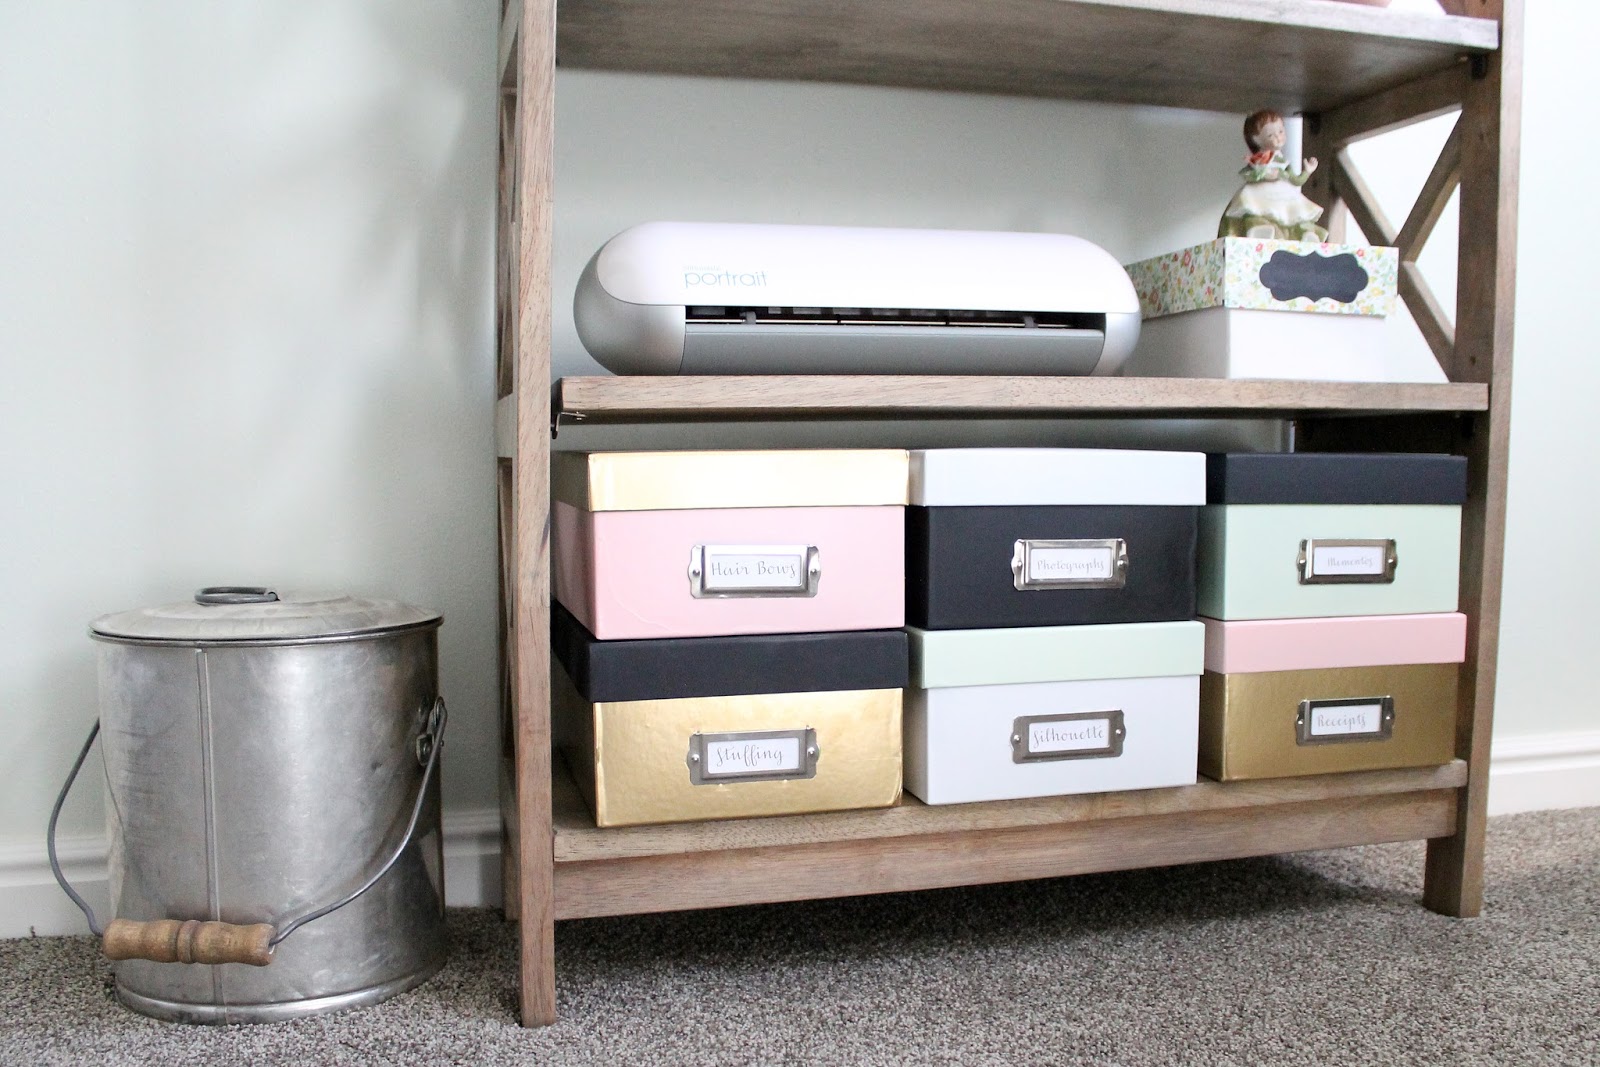
I bought them on super clearance after Christmas (50 cents a pieces!) and spray painted them. Here’s the “before” pic:

The next corner is where I keep projects that are next up in the queue.

I screwed wooden toolboxes right into the wall to use as shelves and hung some fun tissue paper poms and lanterns from the ceiling. I spray painted one gold, which I was a little scared to try, but it worked perfectly.

This metal and wood plaque was stuck in the 90’s, but I painted it, stained the wood and distressed it, and now it’s a perfect place to keep to-do lists, inspiration, or pics.

Next is the big, gorgeous gold vintage tanker desk. It got a glamorous makeover, and so did the chair.

I sewed the roman shades and made the sign above the window. I’m doing heart eyes all over that sign!
I shared the tutorial for the sewing machine cover a few days ago. It was so easy to make!

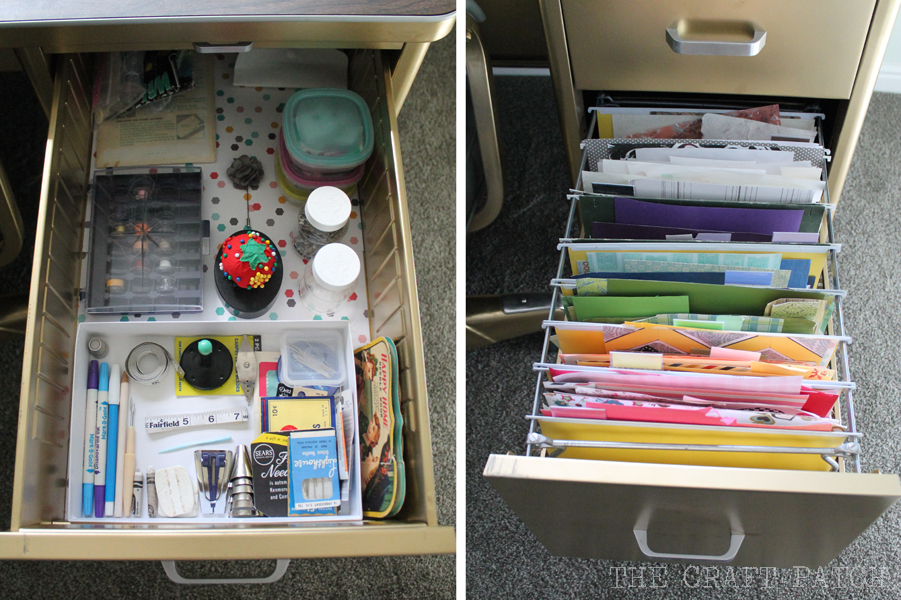
Here’s a peek into all of the desk drawers. I LOVE having all my most-used supplies right at my fingertips:

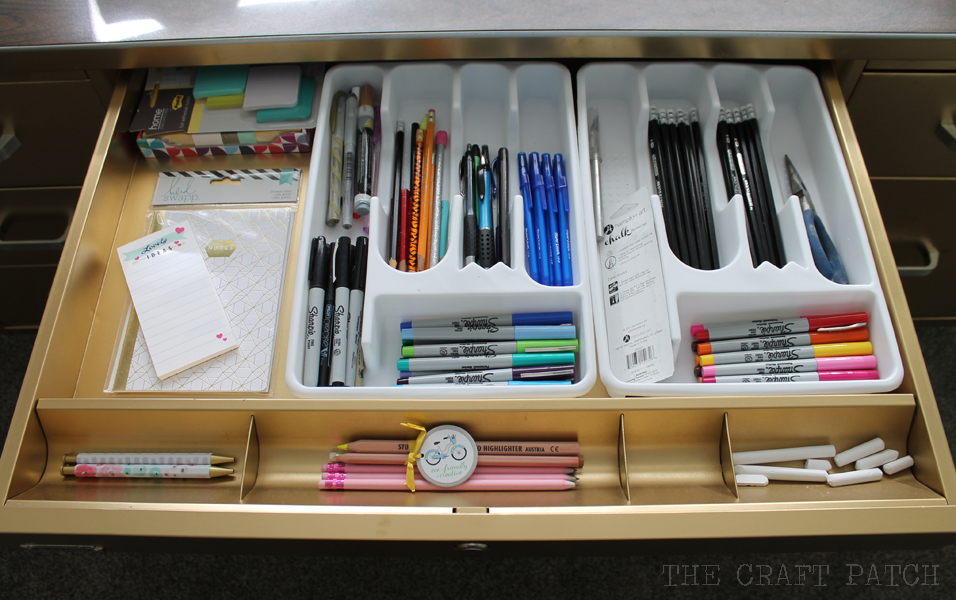
I lined all of the drawers with cute scrapbook paper. My favorite feature is the filing drawer. I use it for all of my paper scraps, which are organized by color, which makes me happy.
The next spot is my favorite. I put together a little gallery wall using mostly items I already had.

A little bit vintage, a little bit modern with pops of gold to add sparkle. So. In. Love.
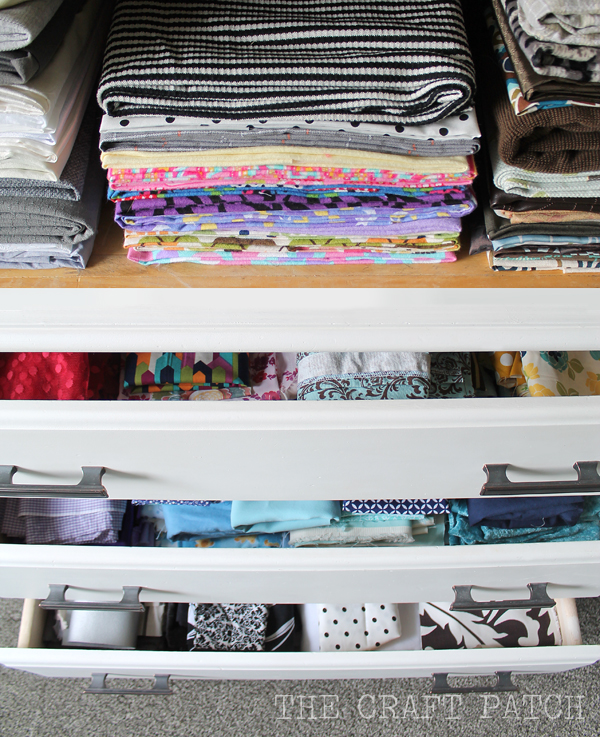
I already shared my armoire makeover and how I’m using it for fabric storage now.
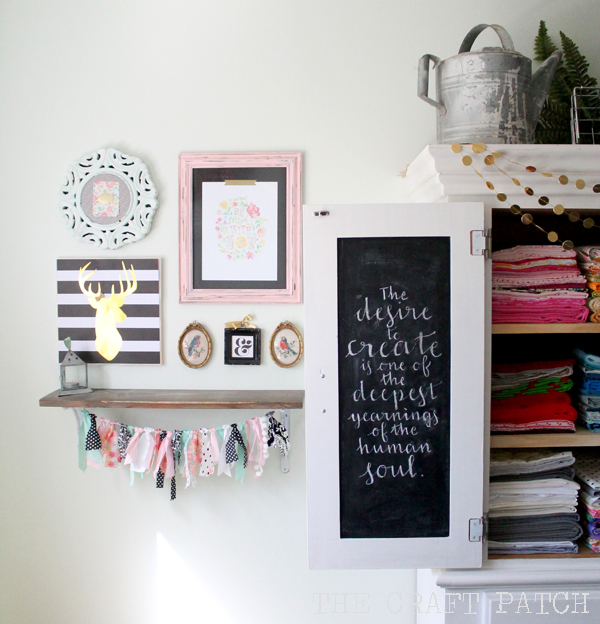

The drawers in the bottom hold all my fabric scraps.
Next up is the vintage printer’s tray.

I decorated it with a paper wreath (tutorial HERE) . The embroidery hoops resting on top are vintage and made of metal. I wish you could see them in person. They are so cool!
The last stop on our craft room tour is the closet. When we ripped the room down to the studs, we decided to frame in a closet. Not only does it give us extra storage, but now our home can be sold as a four bedroom! Cha-ching!
I wanted to build shelving from floor to ceiling, but my husband was worried that if we ever use this room for something else or sell our home, that wouldn’t go over well. So we built the standard shelves and center tower:

Then I bought inexpensive bookcases and put them on either side of the tower. And it actually works really well! You can hardly tell what’s built in and what’s bookcase! If we ever sell, I’ll just remove the bookcases and add clothing rods.
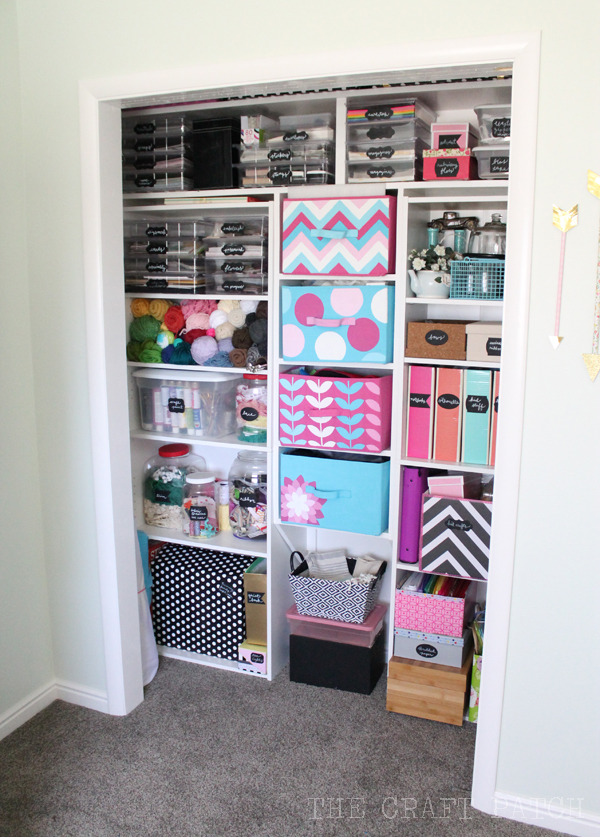
What’s up with the missing closet doors, you ask? Well… we had some problems putting them in. And I was too impatient to wait for hubs to figure out a solution. So eventually we’ll have closet doors, but for now, it’s all open.
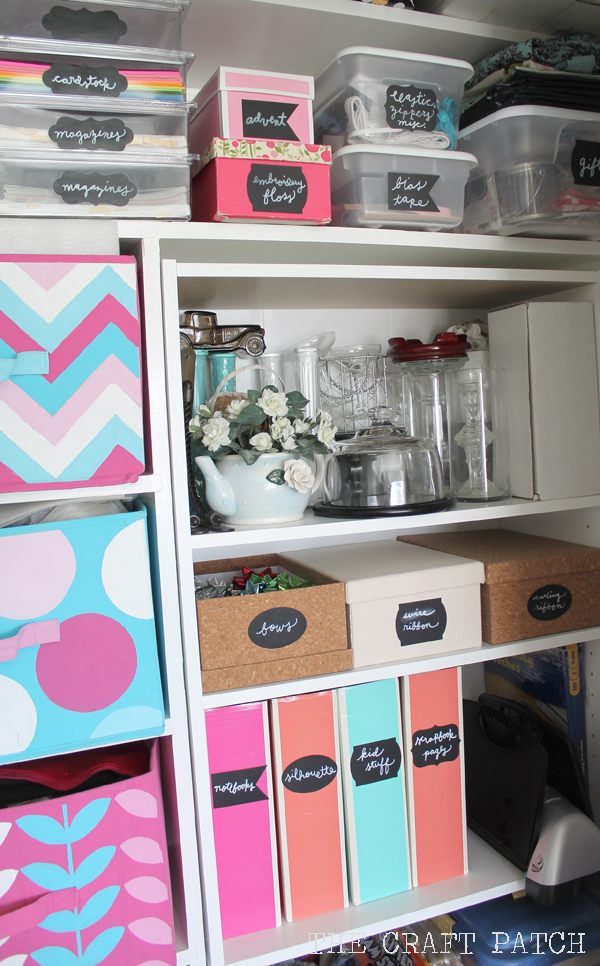
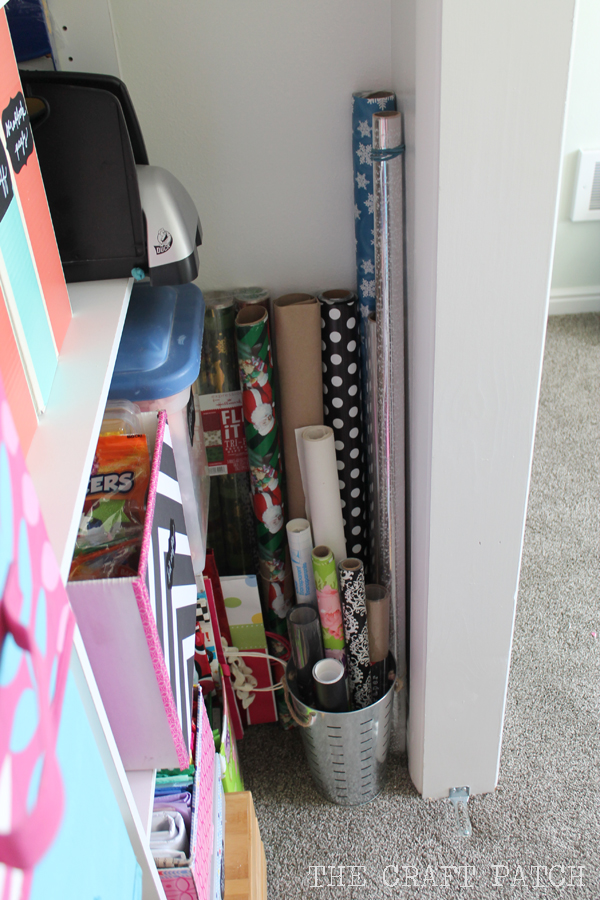
This is where the bulk of my craft supplies are stored. The pretty bins in the center are ones I got at a yard sale and hand painted. The shelf they came with just didn’t fit in this new room, but I had to reuse the bins. I just love them too much!
I love the clear storage boxes (post about them HERE). Everything is protected and organized and where I can easily see it.

Doesn’t that shelf of colorful yarn just make you want to knit something?
I used a lot of different types of storage containers because they were what I had, but I tried to unify them by using the same labels throughout. They are chalkboard labels, so if I ever change the contents of a box, I can easily change the label too.
I utilized every nook and cranny in this closet.

I had a lot of perfectly good boxes that were not pretty. I either spray painted them or covered them in heavy duty wrapping paper.

Now my party supplies have a pretty home.

One last little decor detail:

My husband keeps pointing to bare places on the wall and saying, “You missed a spot.” Ha! Never!
Whew, that was a long post! If you’re still reading, you are a champ!
Below is a breakdown of sources for you. If you have any more questions, just leave me a comment or shoot me an email!
Some affiliate links included in this post.
Sources
Carpet: Tigressa H2O from Carpet One
Wall Color: equivalent to Behr’s Meadow Light
Gold Spray Paint: Rustoleum American Accents 2x Ultra Cover in Metallic Bright Gold
Pink Spray Paint: Krylon’s Ballet Slipper
Green Spray Paint: Krylon’s Seaside Green
Bookcase: Wayfair.com
Polka Dot Wrapping Paper: Hobby Lobby (in the Christmas section)
Clear Storage Containers: ConsumerCrafts.com
Thread Racks: Similar from Hobby Lobby
Gold Garland: Home+Made by Jen Hadfield
Roman Shade Fabric: Nate Berkus from Joann

Comments & Reviews
Ahhh-Mazing, Jen! Love it–and I don't even really craft! Just the organization alone excites me! It is a beautiful, happy place indeed!
Thank you, thank you!
Just beautiful!! So happy for you! Nothing like having your own creative space. Enjoy!
Thank you, Susie! I've already been in there creating and it is so fantastic!
Your room is so welcoming. The vibe is so serene. Love the color choices and your DIYs. It will be an amazing place for creating.
I'm glad you like it, Cheryl! Thanks for the kind comment!
I have a question- how awesome are you?! Also, when can I move in?? I love this space from top to bottom, it is so gorgeous! You really put your heart into every detail, and it shows! My favorite parts? The desk and the closet, and I'm laughing because that looks like a lot of glue sticks, but I still have more! I hope you enjoy your outstanding work for quite a while!
I DID put my heart into the details, and it means the world to me that you noticed! I wish I could invite you and all of my readers over for a craft night. That's the only thing that could make this room better! Thanks, fellow glue stick hoarder. 😉
Wow! I'm so impressed by what you were able to do with this space. It's wonderful! I'm moving my craft room from a large room downstairs to a smaller room upstairs and I can't wait to incorporate some of your ideas. I would never have thought to spray paint photo boxes and am so excited to try it!
I AM obsessed with spray paint. Ha! Thanks, Kristi and have a blast setting up your new craft room!
That's a beautiful and creative space. I'm jealous! I adore the cute thread holders and your notions sign.
Thanks, Rebecca! Those are two of my favorite parts of the room also!
Do you have a tutorial on how you sewed the roman shade? I need to make some! These look perfect!
I've been meaning to write a post about the roman shades. Ha! I basically followed these two tutorials:
http://www.allthingsthrifty.com/2015/03/diy-roman-shades-tutorial.html
http://www.shanty-2-chic.com/2012/02/diy-lined-roman-shades.html
with some moderations of course! The tricky thing for my window was that it is SO big that I couldn't get dowels that were long enough.
Great space, and I love the labels too. That's what I've been working on.
Its a beautiful room and must be such a joy to be in there….I just love your creative flair! and have started following you on Pinterest for inspiration for when I build my own sewing studio….can't wait!
Thank you so much, Cath! It truly is my happy place!
Wow, that is one fantastic craft room! It caught my eye at the DIY Like A Boss party. I am swooning over the thread holders – what a fantastic find.
Thank you Marie! I love those thread holders too. I've had so many people ask me where they can get them that I went hunting for them and found some really similar ones on Amazon. The link is in the sources section at the end of the post. My BFF just bought some for her sewing room!
What happened to the built-in shelving that you showed in your first photos? Did you really just tear it out?
Unfortunately, we HAD to rip those shelves out. They were constructed directly against the cement basement walls with no insulation or Sheetrock behind them, which allowed mice to get back there and destroy everything. We ripped the room down to the studs because it was so gross and contaminated!
Love the ideas you shared. The notes on the paint were a great help. I have a craft corner? In my living room that I have been working through organizing for about 6 months. That’s alot of tutorial read. My craft area is new since I retired from the work,work,work world a couple years ago. I have been frugally building this work area from thrift shops & clearance items. I have used more plastic drawer units than you but it is working well for me. I found a craft table on wheels at our Goodwill & had a couple alterations done to it to suit my fancy (needs). It is shaping very nicely & has become my favorite place in the house.