Make a faux barn wood Christmas tree collar in an hour.
I love the look of those Christmas tree collars made of barn wood. But I do not want to have to store a big old box all year and have you seen the price of these at the store? Sheesh! Too much for me. But I really love the look, so I got creative and came up with a cute tree stand cover that was really inexpensive and easy to make AND it stores flat after Christmas is over. Yay!

That pretty wood tree stand? It’s made of cardboard and paper! The whole thing took about half an hour to make and the only thing I had to buy was the paper! And it is shockingly realistic.
Here’s how you can make your own “wooden” Christmas tree box stand.
Supplies Needed
- Giant Cardboard Box
- Utility Knife
- Hot Glue Gun
- Big Binder Clip
- Bulletin Board Paper
Here are the best paper options I’ve found:
- Hobby Lobby White Shiplap Bulletin Board Paper
- Hobby Lobby Rustic Wood Shiplap Bulletin Board Paper
- Hobby Lobby Weathered Blue Wood Bulletin Board Paper
- Michaels Brick Bulletin Board Paper
- Amazon Black Wood Shiplap Bulletin Board Paper
- Amazon Navy Wood Shiplap Bulletin Board Paper
Most craft stores and teacher supply stores carry several varieties of bulletin board paper, so you can definitely check in-store to see the designs in person. Just look in the teacher supply aisle. And use a coupon or wait for them to go on sale!
Instructions
Step 1. Make a box. Measure the height from the floor to the bottom branches of your Christmas tree. Then measure the width of the tree stand. Cut the cardboard to fit, like this:
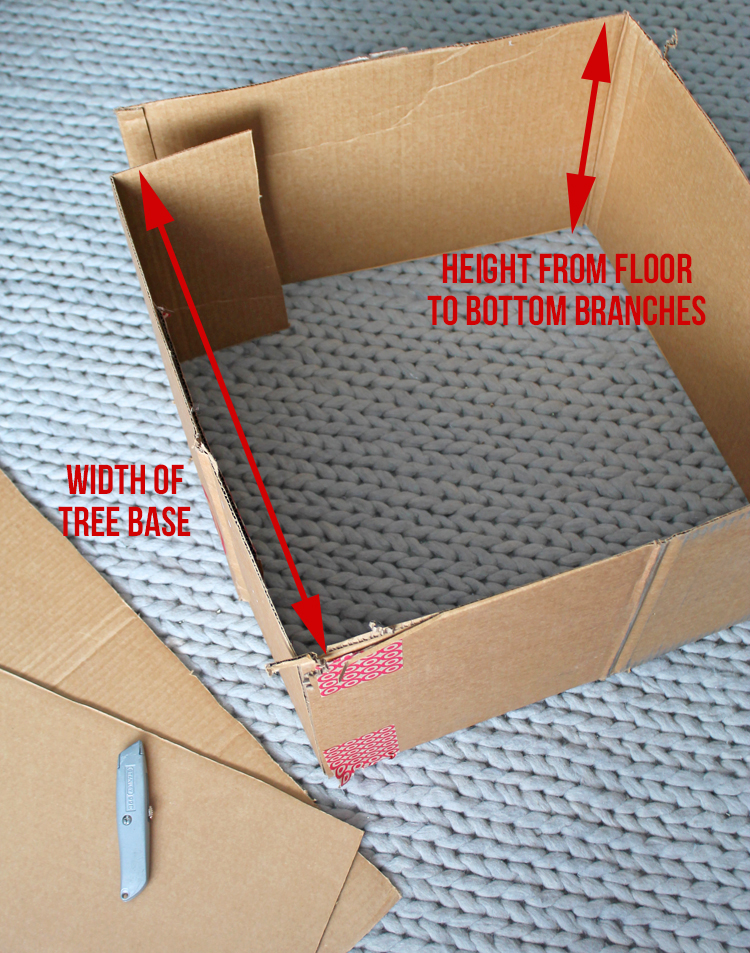
This base doesn’t have a top or a bottom so that you can just slide it around the tree base without having to lift the tree into the box. It makes it super easy to use.
Notice the overlap on one corner. That’s so you can clamp the box together to keep it snug around the tree.
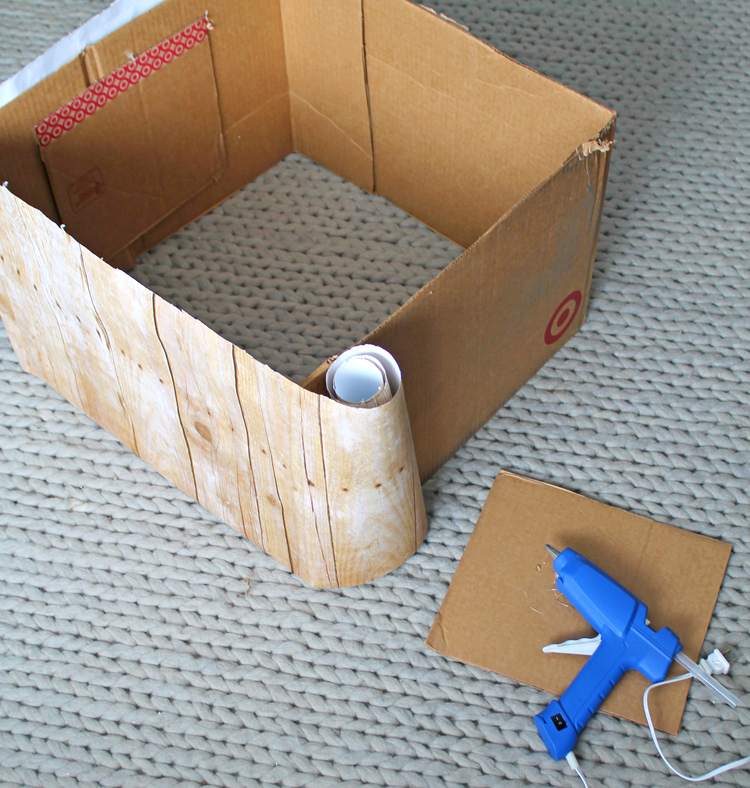
Step 2. Cover the cardboard with paper. I cut through the entire tube of paper so that I was left with a long, skinny roll to use. Line up the factory edge with the bottom edge of the cardboard, then use hot glue to attach the paper to the cardboard all the way around the box.
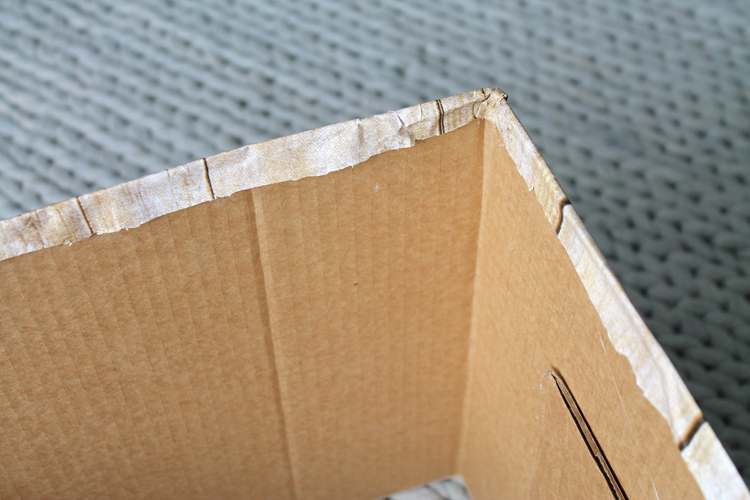
Step 3. Fold the top edge of the paper down and glue it on the inside of the box.
Step 4. Wrap the box around the base of the Christmas tree and use a big binder clip to secure the box together in the back of the tree.

Isn’t it pretty? I don’t think anyone would ever guess what it’s made of and I love the rustic touch it adds to my tree. And guess what else? It folds flat for storage after Christmas is over. HURRAY!

I’m calling this project a Christmas DIY win!
DIY Christmas Tree Box Collar Video
I’ve also got a super popular tutorial for how to decorate Christmas garland like a pro. I’ve broken the process down into simple steps that anyone can follow. Hopefully you find that post helpful too. Happy Christmas decorating!
Pin it so you don’t forget it!


Comments & Reviews
This is awesome! I would never have thought of doing that in a million years. It looks great.
So clever!!!
You are so brilliant! I love when things like this happen. I just so happen to have some birch wood paper I bought at Homegoods that has this DIY written all over it.
Birch wood paper would be GORGEOUS! Send me a pic when you're done… I'd love to see!
This is genius! I am totally going to try this before spending $60 or more on a tree collar at the store. Thank you for sharing 🙂
What a great idea!
This is AWESOME!! I love the look of a tree collar but didn’t want to spend a fortune for one. Or try to figure out storage for it after the season. This is perfect!! Thank you so much for this idea!!
So glad you like it Nancy. I feel the exact same way!
Well even though I already spent money on a round metal one, this is just adorable! I do put up more than one tree so I can still make it! Thank you for sharing, this is such an easy fix!
Thank you! I bought a huge tree and the only really large tree skirts I can find to fit around the stand are crazy expensive! We have a rustic themed tree and i can’t wait to try this with all the large amazon boxes I have piled in the recycling! Thank youuuuu!!
You’ve come up with a first rate solution!! There’s a huge box in my side yard right now that I’m going to do this with! Thank you thank you for this superb idea! I love a good project and this is a diy that I can do without spending much money!!
Brilliant! I don’t have to be thrifty, but I love doing things myself cheaply. This one is great!
I did this last year but covered the cardboard with burlap. I added a small “Merry Christmas” sign that dressed it up but maintained my rustic decor. I love to decorate, especially Christmas; so much so, I started offering my services to friends and family. Projects like this are GREAT because it’s adding character, easily personalized and have little to no effect to the budget.
Brilliant idea